


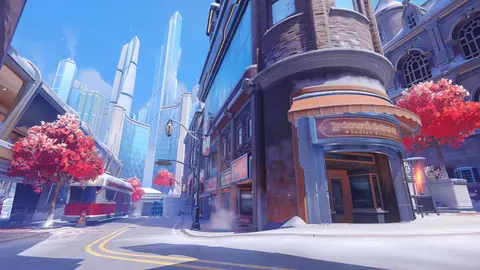
new-queen-street
2 / 2 favorable picks
See map statistics
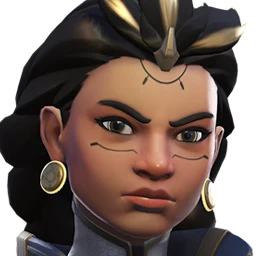
Domina: +1.1 points
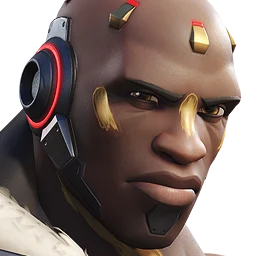
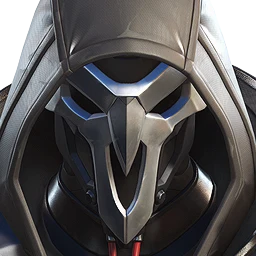
Doomfist: +1 points
Win rate compared with the same hero across all maps. Points means percentage points.

YOUR BENCH, ON TRIAL
Pick 2–4 heroes from one role. We compare their listed Counters, show where a swap covers another pick's weakness, and find your next heroes to learn.
THE VERDICT · TANK
You have options. The enemy still has too many.
Your score balances listed matchup coverage with the benchmark across 2–4 heroes in your role. It measures your options, not your skill.
Your picks against enemies that threaten this pool. A hero can help even when another pick is the stronger counter.
8.3% weighted coverage. 0.88 / 10.5 threat points answered. Strong counters cover more than conditional ones.
among 2-hero Tank pools.
Your pool's same-size percentile is 60. Ties share a rank. This is a comparison with other pools, not a win rate or coverage percentage.
01 · THE READOUT
Doomfist can reach Ana quickly, force defensive cooldowns and deny comfortable backline positioning.

Tier is the hero’s current place in our Tier List. Buff means a recent strengthening, Nerf a weakening, Mixed both, and Rework a changed kit. Tap a badge to see what changed.
The tiers shown are for PC Competitive Role Queue, Bronze to Diamond. Updated 2026-10-20.
Patch reviewed: 2026-10-06, including hotfixes. Your pool score uses counter matchups; these badges do not add or subtract points.
Where does your whole pool have room to play? Maps with more favorable picks come first. Each row compares that hero with their own usual results.
2 / 2 favorable picks
Domina: +1.1 points
Doomfist: +1 points
Win rate compared with the same hero across all maps. Points means percentage points.

1 / 2 favorable picks
Domina: +3.2 points
Doomfist: -1.4 points
Win rate compared with the same hero across all maps. Points means percentage points.

1 / 2 favorable picks
Domina: -2.9 points
Doomfist: +2.8 points
Win rate compared with the same hero across all maps. Points means percentage points.

1 / 2 favorable picks
Domina: +2.3 points
Doomfist: +0.3 points
Win rate compared with the same hero across all maps. Points means percentage points.

Favorable means at least 1 percentage point above that hero's usual win rate. Below usual means at least 1 point lower; smaller differences count as around usual. Missing data stays unknown.
These are individual hero results, not a combined pool win rate or a prediction of your next match. More favorable picks means more alternatives if you need to switch.
PC Competitive Role Queue, all tiers · 2026-10-15. Select a hero for their map guide and source details.
02 · KNOW THE OPPOSITION
See who forces a difficult fight, why they do it, and which pick can help.
SymmetraPressures Domina, DoomfistExposedSustained beam pressure punishes Domina's barrier-heavy frontline play and forces her out of comfortable space.
Symmetra's beam punishes barrier-heavy play. Take short trades, back off when her beam ramps up and fight at range.
Beam pressure and turret control make Doomfist's close-range engages slower, riskier and easier to punish.
Don't dive into Symmetra's turrets and beam. Break the turrets first, or dive targets away from them.
Our counter guide does not recommend Domina / Doomfist against Symmetra. Use the advice above to play the matchup, or explore another pick in the guide.
See the full counter guide
MaugaPressures DoomfistExposedSustained brawl pressure makes Doomfist's frontline commitments difficult to survive or disengage from.
Avoid long fights against Mauga. Dive targets away from him, and punch out as soon as his damage ramps up.
Our counter guide does not recommend Domina / Doomfist against Mauga. Use the advice above to play the matchup, or explore another pick in the guide.
See the full counter guide
PharahPressures DoomfistExposedVertical pressure keeps Pharah outside Doomfist's preferred engagement space and punishes him from above.
You can't pressure Pharah from the ground. Play under roofs and let your hitscan teammates contest her.
Our counter guide does not recommend Domina / Doomfist against Pharah. Use the advice above to play the matchup, or explore another pick in the guide.
See the full counter guide
BastionPressures DominaExposedHeavy sustained damage rapidly punishes Domina whenever defensive resources are unavailable.
Don't hold ground against Bastion when your defensive tools are down. Break line of sight and wait for his window to end.
Our counter guide does not recommend Domina / Doomfist against Bastion. Use the advice above to play the matchup, or explore another pick in the guide.
See the full counter guide
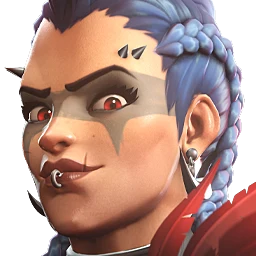
Junker QueenPressures DoomfistExposedSustained brawl pressure makes Doomfist's frontline commitments difficult to survive or disengage from.
Don't get stuck in long brawls with Junker Queen. Hit, take your value and Rocket Punch out before she outlasts you.
Our counter guide does not recommend Domina / Doomfist against Junker Queen. Use the advice above to play the matchup, or explore another pick in the guide.
See the full counter guide
MizukiPressures DoomfistExposedBinding Chain directly restricts Doomfist's mobility and turns committed dives into punishable windows.
Expect your mobility to get locked down. Dive with your team close by and keep an escape ready.
Our counter guide does not recommend Domina / Doomfist against Mizuki. Use the advice above to play the matchup, or explore another pick in the guide.
See the full counter guide
OrisaPressures DoomfistExposedFortify and displacement blunt Doomfist's engage and make his predictable commitment much easier to punish.
Don't punch into Fortify. Wait for it to end, or dive targets away from Orisa while it's up.
Our counter guide does not recommend Domina / Doomfist against Orisa. Use the advice above to play the matchup, or explore another pick in the guide.
See the full counter guide
RamattraPressures DominaExposedRamattra can force a close brawl and maintain pressure through Domina's barrier-oriented defenses.
Don't let Ramattra force a close brawl. Keep distance and back off when his power window is active.
Our counter guide does not recommend Domina / Doomfist against Ramattra. Use the advice above to play the matchup, or explore another pick in the guide.
See the full counter guideCovered means a Strong listed counter. Situational means a Good or Situational partial answer. Exposed means this enemy pressures a pick but no counter is listed in your pool. Unlisted matchups stay unknown.
PLAN B, PLEASE
Tap a hero to ban them. See who you can still play and which swaps you lose.
Your original pool stays selected. This is just a practice scenario.
Domina IS BANNED
×
You lose Domina's best counter option in these matchups:
Domina was your swap here.
Barrier control and knockback deny space and punish Torbjörn when they try to force a direct engagement.
Domina was your swap here.
Barrier control and knockback deny space and punish Zarya when they try to force a direct engagement.
1.9% weighted coverage. 0.13 / 6.5 threat points answered.
One hero remains. The score and percentile require 2–4 heroes, so neither is rated here.
Doomfist IS BANNED
×
You lose Doomfist's best counter option in these matchups:
Doomfist was your swap here.
Doomfist can reach Ana quickly, force defensive cooldowns and deny comfortable backline positioning.
Doomfist was your swap here.
Displacement can disrupt Winston’s landing and give a pressured teammate room to escape.
Remaining option: Domina. Community matchup data favors Domina, but the advantage needs confirmation across maps and ranks.
1.6% weighted coverage. 0.06 / 4 threat points answered.
One hero remains. The score and percentile require 2–4 heroes, so neither is rated here.
03 · BUILD A BETTER BENCH
One hero to learn. More ways out of a bad matchup.

Keep your picks. Add a new way to fight back.
+
Examples of the matchups you improve by learning this hero.
Mobility lets D.Va contest Pharah's vertical space and force them off comfortable angles.
Defense Matrix denies key ranged pressure while Boosters let D.Va force Bastion out of position.
Start with these matchups when you practice the new pool.
D.Va brings different weaknesses too. Check these before you swap.
CoverageBefore 8.3% After 20.5%
Pool scoreBefore 15 After 40 /100
Coverage gain: +12.2 percentage points, including the new pool's own weaknesses.
Before: 0.88 / 10.5 threat points. After: 2.88 / 14.
Adding a slot changes pool size; same-size percentiles are not compared. These recommendations are alternatives, not a combined pool.

Keep your picks. Add a new way to fight back.
+
Examples of the matchups you improve by learning this hero.
Mobile frontline pressure and a frontal barrier let D.Mon contest Symmetra's space without giving them easy angles.
Start with these matchups when you practice the new pool.
D.Mon brings different weaknesses too. Check these before you swap.
CoverageBefore 8.3% After 16.3%
Pool scoreBefore 15 After 32 /100
Coverage gain: +7.9 percentage points, including the new pool's own weaknesses.
Before: 0.88 / 10.5 threat points. After: 2.56 / 15.75.
Adding a slot changes pool size; same-size percentiles are not compared. These recommendations are alternatives, not a combined pool.
Matchups reviewed for 2026-10-06. This measures listed matchups, not player skill, map fit, or the current live meta.
NEXT STEP
Upload your final scoreboard and see what actually happened.
HOW THE COURT SCORES IT
Hero Pool Score: practical matchup coverage, balanced against every 2-, 3- and 4-hero pool in your role. Each size gets equal weight. The score combines that standing with your actual coverage, so being a great pair does not hide big gaps. It is a matchup guide, not a promise of wins. Season 5 includes conditional kit inferences for new and reworked heroes; this percentile compares the listed graph, not observed match results.
Coverage: Strong threats count for 1 point, Good for ½ and Situational for ¼. Your best listed answer covers all, half or a quarter of a threat respectively. Conditional answers help, but do not erase a weakness. Shared threats count for each hero they pressure.
Among pools your size: the secondary percentile shows how efficiently you use your slots. Top 10% means your coverage beats roughly nine out of ten pools with the same role and number of heroes. Ties share a rank.
Next heroes: the first option brings the largest useful gain against your current threats. The second offers different coverage. Each must also improve the coverage rate of the resulting pool, including its new weaknesses. With four picks, we test replacements and name the hero to swap out. Options are alternatives, not a promise that both belong in the same pool.
Map, execution and team composition still matter. Missing matchups are unknown, not proof of safety. Check how the latest patch hits your heroes, explore the reasons in Overwatch Counters or broader performance on the Tier List. Shared links recalculate with the current catalog; no result snapshots are stored.